
1506 Appartements à Monroe


The Islands of Islamorada
Islamorada
- 10 personnes
- Air conditionné
- Le chauffage
- Piscine
- Parking
- Ascenseur
- Balcon
- Jardin
- Tv
- Cheminée
- Barbecue
- Serviettes
- Feuilles
61 avis


Cabins at Bonefish Bay
Marathon - À 1.7 km du centre
- 37 M2
- 6 personnes
- Air conditionné
- Piscine
- Parking
- Tv
- Barbecue
- Serviettes
- Feuilles
42 avis


Island Bay Resort
Tavernier
- 2 personnes
- Cuisinette
- Air conditionné
- Le chauffage
- Parking
- Jardin
- Tv
- Barbecue
- Serviettes
114 avis


Aqua Lodge Rentals At Coconut Cay
Marathon - À 1.6 km du centre
- 33 M2
- 4 personnes
- Air conditionné
- Piscine
- Parking
- Tv
- Serviettes
- Feuilles
160 avis


Vacay Vibes-2 Pools, Pickleball, Coffee Bar, 2 Jacuzzis, Food Truck
Key Largo
- 233 M2
- 4 chambres
- 10 personnes
- Air conditionné
- Le chauffage
- Terrasse
- Piscine
- Parking
- Jardin
- Barbecue
12 avis


Indigo Reef Resort Villas & Marina by KeysCaribbean
Marathon - À 860 m du centre
- 153 M2
- 8 personnes
- Air conditionné
- Le chauffage
- Terrasse
- Piscine
- Parking
- Balcon
- Jardin
- Tv
- Machine à laver
- Barbecue
- Serviettes
- Feuilles
49 avis


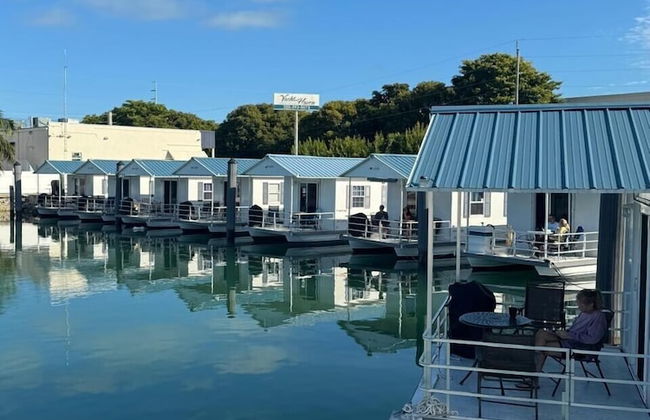
Yacht Haven Marina
Marathon - À 3.2 km du centre
- 30 M2
- 6 personnes
- Cuisinette
- Air conditionné
- Parking
- Tv
- Barbecue
- Serviettes
- Feuilles
140 avis


Villa Valbuena Gem Key Largo 2 Kings Marina Pickleball Tennis 3 Pools Remodeled 2025
Key Largo
- 121 M2
- 2 chambres
- 7 personnes
- Air conditionné
- Piscine
- Parking
- Ascenseur
28 avis


Angler's Reef Resort by KeysCaribbean
Islamorada
- 153 M2
- 4 personnes
- Air conditionné
- Le chauffage
- Piscine
- Parking
- Jardin
- Tv
- Machine à laver
- Barbecue
- Serviettes
- Feuilles
14 avis


Key Largo Cottages
Key Largo
- 50 M2
- 8 personnes
- Cuisinette
- Air conditionné
- Terrasse
- Balcon
- Jardin
- Tv
- Barbecue
- Serviettes
20 avis


Villa Valbuena Aqua Vista Key Largo Marina Pickleball Remodeled 2025
Key Largo
- 12 M2
- 2 chambres
- 7 personnes
- Air conditionné
- Le chauffage
- Piscine
- Parking
- Jardin
- Barbecue
11 avis


The Reef at Marathon
Marathon - À 2 km du centre
- 6 personnes
- Air conditionné
- Le chauffage
- Piscine
- Tv
- Machine à laver
- Barbecue
- Serviettes
- Feuilles
129 avis


NAUTILUS...ocean front cottage retreat ~
Summerland Key - Cudjoe Key
- 79 M2
- 2 chambres
- 6 personnes
- Air conditionné
- Terrasse
- Piscine
- Parking
- Jardin
- Barbecue
20 avis


Skipjack Resort & Marina
Marathon - À 3.7 km du centre
- 8 personnes
- Cuisinette
- Air conditionné
- Le chauffage
- Terrasse
- Piscine
- Parking
- Ascenseur
- Balcon
- Jardin
- Tv
- Machine à laver
- Serviettes
- Feuilles
1181 avis


Amelia Home by Avantstay In Historic Old Town w/ Pool
Key West
- 127 M2
- 2 chambres
- 6 personnes
- Air conditionné
- Terrasse
- Piscine
- Parking
- Tv
- Machine à laver
- Barbecue
- Serviettes
- Feuilles
2 avis


Coral Lagoon Resort Villas & Marina by KeysCaribbean
Marathon - À 1.3 km du centre
- 125 M2
- 6 personnes
- Air conditionné
- Le chauffage
- Piscine
- Parking
- Balcon
- Tv
- Machine à laver
- Serviettes
- Feuilles
60 avis


Kawama Yacht Club Apartment
Key Largo
- 123 M2
- 2 chambres
- 6 personnes
- Air conditionné
- Le chauffage
- Terrasse
- Piscine
- Parking
- Ascenseur
- Jardin
- Barbecue
48 avis


Coconut Mallory Resort And Marina By Kees Vacations
Key West
- 98 M2
- 6 personnes
- Cuisinette
- Air conditionné
- Le chauffage
- Piscine
- Parking
- Ascenseur
- Balcon
- Tv
- Barbecue
- Serviettes
- Feuilles
808 avis


Villa Valbuena Ocean Pearl Key Largo Pool Restaurant Marina Pickleball
Tavernier
- 74 M2
- 2 chambres
- 6 personnes
- Air conditionné
- Le chauffage
- Terrasse
- Piscine
- Parking
- Ascenseur
- Jardin
12 avis