
1542 Appartements à Illinois


Kasa River North Chicago
Chicago - Near North Side - À 910 m du centre
- 98 M2
- 2 chambres
- 5 personnes
- Air conditionné
- Le chauffage
- Terrasse
- Piscine
- Ascenseur
- Tv
- Machine à laver
- Serviettes
- Feuilles
141 avis


The Neighborhood Hotel-Little Italy
Chicago - Near West Side - À 2.5 km du centre
- 6 personnes
- Cuisinette
- Air conditionné
- Le chauffage
- Terrasse
- Ascenseur
- Balcon
- Tv
- Serviettes
- Feuilles
157 avis


The Gem Museum Suites
Evanston - À 710 m du centre
- 8 personnes
- Cuisinette
- Air conditionné
- Le chauffage
- Terrasse
- Parking
- Ascenseur
- Jardin
- Tv
- Machine à laver
- Serviettes
- Feuilles
60 avis


Kasa South Loop Chicago
Chicago - South Loop - À 1.1 km du centre
- 129 M2
- 3 chambres
- 6 personnes
- Air conditionné
- Le chauffage
- Terrasse
- Parking
- Ascenseur
- Balcon
- Jardin
- Tv
- Machine à laver
- Barbecue
- Serviettes
- Feuilles
283 avis


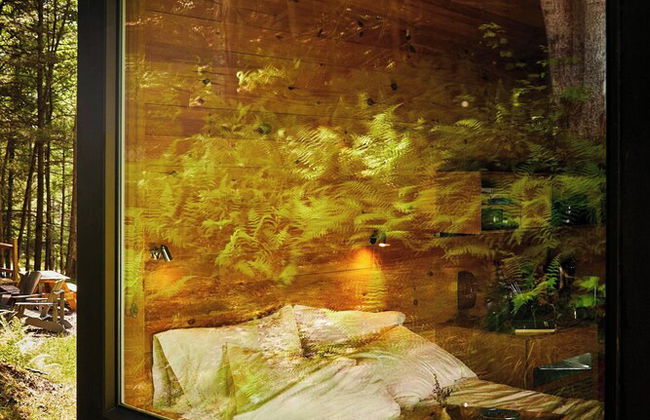
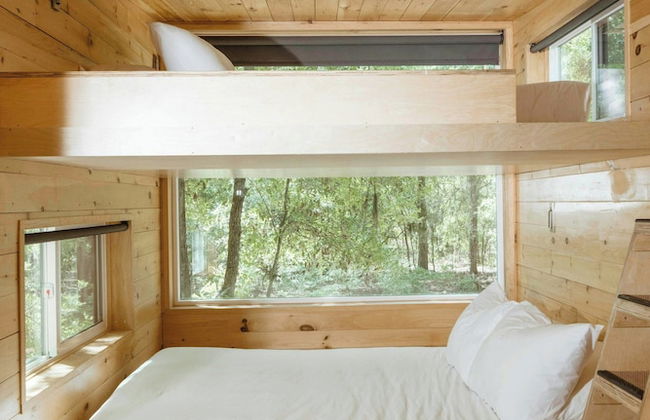


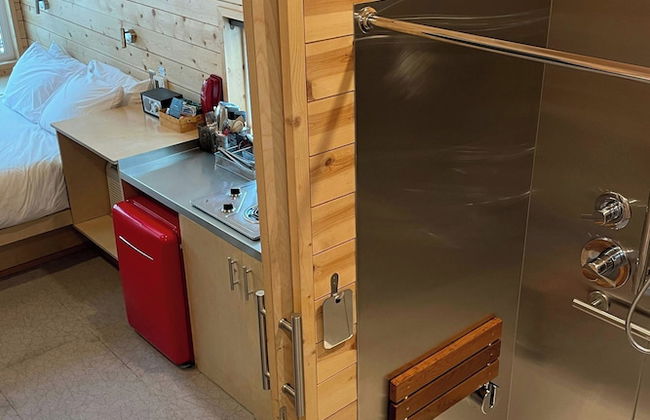
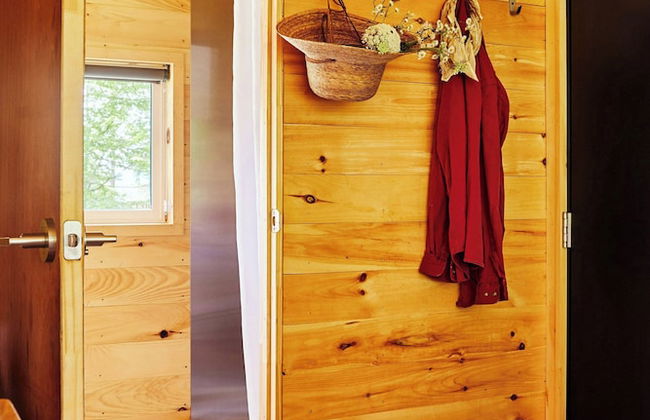


Postcard Cabins Starved Rock, Outdoor Collection by Marriott Bonvoy
Ottawa - À 3 km du centre
- 14 M2
- 4 personnes
- Cuisinette
- Air conditionné
- Le chauffage
- Terrasse
- Parking
- Cheminée
- Serviettes
- Feuilles
21 avis


Sentral Michigan Avenue
Chicago - South Loop - À 1.1 km du centre
- 4 personnes
- Air conditionné
- Le chauffage
- Piscine
- Parking
- Ascenseur
- Jardin
- Tv
- Machine à laver
- Cheminée
- Barbecue
- Serviettes
- Feuilles
743 avis


Level Chicago – Old Town
Chicago - Near North Side - À 1.6 km du centre
- 146 M2
- 8 personnes
- Air conditionné
- Terrasse
- Piscine
- Parking
- Ascenseur
- Jardin
- Tv
- Machine à laver
- Cheminée
- Barbecue
- Serviettes
- Feuilles
310 avis


Kasa Magnificent Mile Chicago
Chicago - River North - À 780 m du centre
- 108 M2
- 2 chambres
- 5 personnes
- Air conditionné
- Le chauffage
- Parking
- Ascenseur
- Balcon
- Tv
- Machine à laver
- Serviettes
- Feuilles
398 avis


Trendy West Town Flat - 2 bed / 1.5 bath w parking
Chicago - West Town - À 3.1 km du centre
- 102 M2
- 2 chambres
- 5 personnes
- Air conditionné
- Le chauffage
- Terrasse
- Parking
- Jardin
33 avis


Roscoe Village Guesthouse
Chicago - Roscoe Village - À 7 km du centre
- 241 M2
- 10 personnes
- Air conditionné
- Le chauffage
- Parking
- Jardin
- Machine à laver
- Cheminée
- Serviettes
- Feuilles
69 avis


Wrigley Suites
Chicago - Lake View - À 5.9 km du centre
- 111 M2
- 11 personnes
- Air conditionné
- Le chauffage
- Terrasse
- Ascenseur
- Tv
- Machine à laver
- Serviettes
- Feuilles
2 avis


The Burnham Hotel Jackson Blvd Chicago Illinois , Belvilla District 6 Formerly Sonder
Chicago - West Loop - À 570 m du centre
- 4 personnes
- Air conditionné
- Le chauffage
- Ascenseur
- Tv
- Serviettes
167 avis


Harbor Master Villa #230
Ottawa - À 4 km du centre
- 46 M2
- 4 personnes
- Air conditionné
- Le chauffage
- Piscine
- Parking
- Tv
- Machine à laver
3 avis


Yugo Guest Suites
Urbana - À 760 m du centre
- 4 personnes
- Cuisinette
- Parking
- Ascenseur
- Tv
- Machine à laver
- Serviettes
- Feuilles
86 avis


Nauvoo Vacation Villas & Condos
Nauvoo
- 87 M2
- 7 personnes
- Cuisinette
- Air conditionné
- Le chauffage
- Parking
- Jardin
- Tv
- Machine à laver
- Barbecue
- Serviettes
- Feuilles
395 avis


Lux Apts with Lake Views and Top Amenities
Chicago - South Loop - À 1.2 km du centre
- 194 M2
- 3 chambres
- 7 personnes
- Air conditionné
- Terrasse
- Piscine
- Parking
- Jardin
- Barbecue
21 avis


Luxéry Stay Chicago - Themed Units! Close to Downtown, McCormick Place & Wintrust Arena
Chicago - Near South Side - À 3 km du centre
- 107 M2
- 7 personnes
- Air conditionné
- Le chauffage
- Terrasse
- Parking
- Ascenseur
- Jardin
196 avis


2BR Rustic Villa
Oglesby
- 167 M2
- 2 chambres
- 6 personnes
- Air conditionné
- Le chauffage
- Terrasse
- Parking
- Jardin
- Barbecue
13 avis


Derinda House
Elizabeth
- 130 M2
- 3 chambres
- 6 personnes
- Air conditionné
- Le chauffage
- Terrasse
- Parking
- Jardin
- Barbecue
13 avis