Section L Yushima

32 photos
Photo 1 - Section L Yushima
Photo 2 - Section L Yushima
Photo 3 - Section L Yushima

Description

Informations sur les services

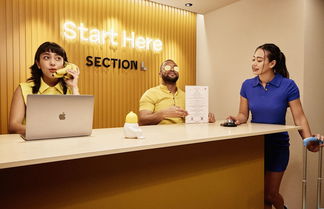
Les équipements et services proposés incluent un service d'arrivée express, un service de départ express et une consigne à bagages.

Emplacement
chome-Yushima Tokyo, Japon

Équipements et services

Accès et localisation
  • Coffre-fort

Chauffage et climatisation
  • Air conditionné

Nourriture et cuisine
  • Grille-pain
  • Vaisselle
  • Congélateur
  • Théière
  • Réfrigérateur
  • Micro-onde
  • Cuisinière

Chambres et nettoyage
  • Feuilles
  • Ustensiles de nettoyage
  • Chaussons
  • Serviettes
  • Le fer
  • Machine à laver
  • Sèche-cheveux

Divertissement
  • Internet (wifi)
  • Tv

Les services
  • Service de blanchisserie
  • Compartiment de bagage

Santé
  • Programme de nettoyage amélioré
  • Mesures d'hygiène supplémentaires
  • Check-in/out sans contact

Conditions

Horaires
  • Arrivée à partir de 15:00h jusqu'à 01:00h
  • Départ jusqu'à 11:00h

Restrictions

Interdit de fumer
Animaux interdits


Voulez-vous voir d'autres options?
Nous avons trouvé ces autres suggestions qui pourraient vous plaire...
9.6 Exceptionnel 11 avis
Aparthotel à Tokyo
Meilleurs choix
À 6 km du centre
9.8 Exceptionnel 48 avis
Aparthotel à Tokyo
Recommandé par les clients
À 4.9 km du centre
9.4 Exceptionnel 261 avis
Aparthotel à Tokyo
Meilleurs choix
À 2.8 km du centre
9.6 Exceptionnel 105 avis
Aparthotel à Tokyo
Meilleurs choix
À 2.6 km du centre
9.6 Exceptionnel 37 avis
Copropriété à Tokyo
Meilleurs choix
À 3.5 km du centre
9.6 Exceptionnel 195 avis
Aparthotel à Tokyo
Meilleurs choix
À 2.1 km du centre

Photos du logement

Photo 1 - Section L Yushima
Photo 2 - Section L Yushima
Photo 3 - Section L Yushima
Photo 4 - Section L Yushima
Photo 5 - Section L Yushima
Photo 6 - Section L Yushima
Photo 7 - Section L Yushima
Photo 8 - Section L Yushima
Photo 9 - Section L Yushima
Photo 10 - Section L Yushima
Photo 11 - Section L Yushima
Photo 12 - Section L Yushima
Photo 13 - Section L Yushima
Photo 14 - Section L Yushima
Photo 15 - Section L Yushima
Photo 16 - Section L Yushima
Photo 17 - Section L Yushima
Photo 18 - Section L Yushima
Photo 19 - Section L Yushima
Photo 20 - Section L Yushima
Photo 21 - Section L Yushima
Photo 22 - Section L Yushima
Photo 23 - Section L Yushima
Photo 24 - Section L Yushima
Photo 25 - Section L Yushima
Photo 26 - Section L Yushima
Photo 27 - Section L Yushima
Photo 28 - Section L Yushima
Photo 29 - Section L Yushima
Photo 30 - Section L Yushima
Photo 31 - Section L Yushima
Photo 32 - Section L Yushima